One of the things Safeguard Europe get asked the most is ‘how do I use a moisture meter to diagnose dampness in masonry walls?’
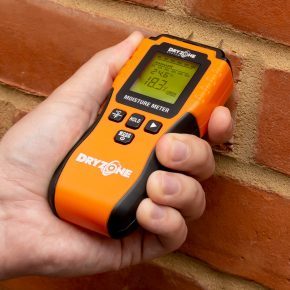
There are many types of moisture meters on the market, at varying price points. This piece focuses on pinned resistance-type electrical conductivity moisture meters — these are usually economically priced handheld devices in the shape of a TV remote with two metal pins on top. Although calibrated for timber, this type of moisture meter can be used to create moisture profiles on masonry.
They are easy to use by simply pushing the spikes into the substrate to measure its moisture content. Moisture meters measure how freely the electrical current emitted by the pins runs through the substrate and give an indication of the moisture levels inside. They typically display Wood Moisture Equivalency (%WME).

However, due to variations in the conductivity of masonry materials and the endless combinations of these materials in the built environment, you should not rely on electrical moisture meters for accurate moisture content measurements. They are best used to give a relative indication of moisture in building materials. There is more on this below…
Check out the Dryzone Moisture Meter here
As moisture meters use electrical conductivity to detect moisture, other electrically conductive materials that are present in a wall may skew a moisture meter reading.
These include:
– Hygroscopic salts or efflorescence
– Foil used on or behind the walls (such as in foil-backed plasterboard)
Truly accurate methods of damp detection are invasive in nature, costly and time-consuming. Homeowners often baulk at the wall samples and laboratory analysis needed to carry out gravimetric or carbide meter tests, so the use of a simple electrical moisture meter is a valuable skill to learn.
Moisture meters are a helpful tool, but are best used with a combination of knowledge, experience and a willingness to follow your senses.
How to Establish a Moisture Profile
To understand where dampness is showing on a wall and the value of that relative reading, we must create a ‘grid’ of readings to form a ‘moisture profile’. Take vertical and horizontal readings at 300 mm centres across the whole area of the damp-affected wall and plot them out. The location and value of readings will indicate what sort of dampness we might be experiencing. Taking regular measurements will also help to avoid the mistake of misdiagnosing condensation as rising damp when reading ‘dry at the top and damp at the bottom equates to rising damp’.
Some Example Moisture Profiles
– High readings at the base of the wall, usually to a height of 300-1000 mm, with a sudden cut-off point is a typical moisture profile of rising damp.
– Low levels of moisture at the bottom of the wall that increase then suddenly cut off is a typical moisture profile of controlled rising damp. The high readings at the top of the wall in this example are caused by salts remaining in the wall following the drying-out process.
– High moisture readings at the bottom of the wall, followed by a slight dip then an increase is typical of partially controlled rising damp.
– High readings just above the skirting board or at the base of the wall are typical of a floor-to-wall junction problem.
– Zero or low readings on the lower part of the wall with a band of very high readings above are typical of failed damp-proofing. Replastering (following remedial DPC installation) holds back damp at the base of the wall, while damp rises above the replastered area.
– High readings at the base of the wall, followed by a steady decline that stretches to the top of the wall is typical of high humidity or condensation. This type of damp is often found on wallpapered or semi-permeable wall finishes.
Investigations
By finding out how moisture levels vary within a wall, further investigations can be made to discover the root cause. Could a high reading only at the top of the wall be due to a broken or leaking water or heating pipe in the wall or on the other side? Remember, it’s not about the exact moisture percentage, but rather about detecting a trend or pattern that points to where further analysis is required. Equipment like the Dryzone Moisture Meter should only be used to establish a moisture profile, not used to measure exact and accurate levels of moisture in materials other than timber (which is the domain of gravimetric laboratory testing).
The moisture meter is a must-have for anyone’s damp-proofing kit, but it should ideally be used with care and knowledge. Want to know more about how to diagnose dampness? Check out Safeguard’s Dampness in Buildings CPD Webinar on Tuesday, 1st October at 1 PM.
Got any questions about using a moisture meter to detect damp? Get in touch with Safeguard‘s technical team. They will be happy to share their knowledge and offer advice on your current projects. Email info@safeguardeurope.com or call 01403 210204.