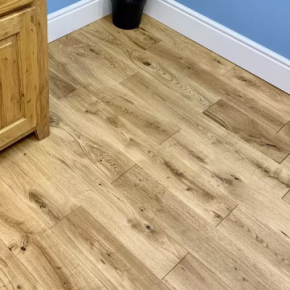
How to install solid wood flooring? Luxury Flooring and Furnishings discuss
For those of us who are DIY savvy, installing our new flooring can be a bit of an enjoyable, interesting challenge. Once you know how however, it’s not something you forget so be careful that you don’t become your family’s free fitter! Here are the steps and different methods you can get stuck into to get your wooden flooring solid and secure.
Before thinking about installing real wood flooring, it’s important that the product has been left to properly acclimatise for at least seven days before laying it. This is due to it expanding under heat and damp.
The method you use is identified by which subfloor. If a concrete subfloor is being used then gluing is the advised, however if there are any uneven parts then lay plywood down to smooth it out.
It is sometimes necessary for damp proof membrane to be placed down, designed to prevent moisture rising through the wood.
Whichever method you decide on, its recommended that a threshold or relevant material is used for further expansion gaps if you are laying the flooring over 7.5 linear metres.
If this is not done, you run the risk of the floor buckling as it doesn’t have enough room to expand.

Nailing method
After you have left the wood to acclimatise, start by lying the flooring at the longest wall leaving an expansion gap of around 10mm.
Insert fixings ensuring that the joints at each end of the board are around 100m apart.
Lastly, remove all spacers and fit threshold strips around the perimeter of the floor to cover the expansion gaps.

Gluing method
Dry lay the first boards by starting at the longest wall in which the tongues of the first couple of rows should face the wall leaving expansion gap of around 10mm.
Pull up the first couple of rows and apply the adhesive evenly to the subfloor. Lay the flooring on to the adhesive ensuring spacers are used creating an expansion gap of 10mm.
It is recommended that all floor is pre-measured and to only lay a couple at a time, working from the longest wall to the other side of the room.
Once all floor is laid, remove all spacers and fit threshold strips around the perimeter of the floor to cover the expansion gaps.
The main thing to remember is take your time, do not do this in a rush. Your wooden flooring is designed to last years if installed correctly and all the recommended protection materials are used.
Latest news

27th March 2025
Mitsubishi Electric: Spring Statement reaction
Russell Dean, Deputy Divisional Manager at Mitsubishi Electric, welcomes the OBR’s conclusion that housebuilding will reach a forty-year high under planning reforms.
Posted in Articles, Building Industry News, Building Products & Structures, Building Regulations & Accreditations, Building Services, Facility Management & Building Services, Heating Systems, Controls and Management, Heating, Ventilation and Air Conditioning - HVAC, news, Pipes & Fittings, Plumbing, Retrofit & Renovation, Sustainability & Energy Efficiency
26th March 2025
BMBI: Builders’ Merchants value sales down -2.3% in January year-on-year, with flat volume sales and prices down -2.3%
The latest Builders Merchant Building Index (BMBI) report shows builders’ merchants value sales in January were down -2.3% compared to the same month in 2024. Volume sales were flat (+0.0%) and prices slipped -2.3%. There was no difference in trading days.
Posted in Architectural Ironmongery, Articles, Bathrooms & Toilets, Bathrooms, Bedrooms & Washrooms, Bricks & Blocks, Building Associations & Institutes, Building Industry News, Building Products & Structures, Building Services, Building Systems, Civil Engineering, Concrete, Cement, Admixtures, Doors, Drainage, Drainage Services, Drainage, Guttering, Soffits & Fascias, Facility Management & Building Services, Fascias, Hand Tools, Hard Landscaping & Walkways, Heating Systems, Controls and Management, Heating, Ventilation and Air Conditioning - HVAC, Information Technology, Interior Design & Construction, Interiors, Kitchens, Landscaping, news, Pipes, Pipes & Fittings, Plant, Equipment and Hire, Plumbing, Posts, Power Tools, Publications, Research & Materials Testing, Retrofit & Renovation, Timber Buildings and Timber Products, Walls, Windows
26th March 2025
Encasement Verta column casings - covering up with style
The demands of architects and specifiers seeking to create stylish finishes on a diverse range of building interior and exterior projects are the main drivers behind the versatility and extensive choice available within the Encasement Verta column casing range.
Posted in Articles, Building Industry News, Building Products & Structures, Canopies, Entrances & Column Casings, Case Studies, Interior Design & Construction, Interiors, Restoration & Refurbishment, Retrofit & Renovation, Walls
26th March 2025
Pyroguard launches on-demand CPD webinar
Pyroguard has launched an on-demand version of its RIBA-approved CPD seminar – ‘Fire safety glazing: a system, not a product’ – in a bid to guide the industry regarding the critical role of fire safety glass.
Posted in Articles, Building Industry Events, Building Industry News, Building Products & Structures, Building Services, Continuing Professional Development (CPD's), Glass, Glazing, Health & Safety, Information Technology, Innovations & New Products, Posts, Retrofit & Renovation, Seminars, Training, Windows
 Sign up: