Fitting plasterboard with insulation to internal walls is usually straightforward, but only if the specification is right and the installation is done properly. Get either part wrong and you end up with poor thermal performance, failed bonds, or a finish that needs redoing.
Here’s what tends to go wrong most often:
- Damp gets ignored
- Board thickness is guessed, not calculated
- Surface prep is rushed or skipped
- Dot and dab is done badly
- Joint finishing is rushed
These issues come up again and again on real jobs. The good news is they are all avoidable with the right approach.

-
Fitting Boards Over an Untreated Damp Wall
Moisture behind insulated plasterboard does not stay harmless for long. It gets trapped, and once that happens, it slowly starts to break the system down from behind.
What to look for before installation
Start with a careful visual check. Staining, tide marks, and efflorescence are all signs that moisture has been present. You will often spot these around window reveals, near skirting level, or along the base of the wall.
It also helps to physically check the surface. If the plaster feels soft or crumbly under pressure, that usually points to ongoing or long-term damp exposure.
Why rushing this step causes failure
A wall can appear dry on the surface while still holding moisture deeper in the structure. If boards go up too soon, that moisture becomes trapped with nowhere to escape.
The result is predictable. Insulation performance drops, the plasterboard weakens, and eventually the bond fails. Treat the source first, then allow enough time for the wall to dry properly before continuing.
-
Choosing the Wrong Board Thickness for the Thermal Target
Board thickness is not just a sizing decision, it directly affects how well the wall performs. Guessing here is where many projects start to drift off spec.
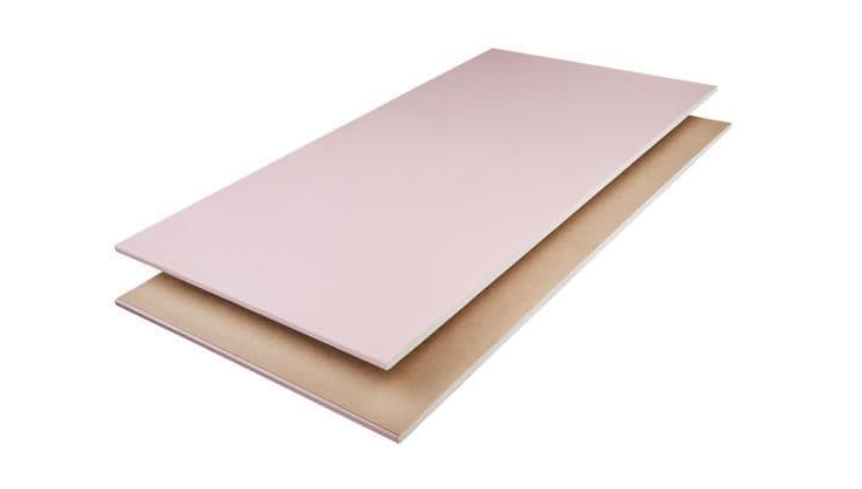
How thickness affects U-value
Most insulated plasterboards combine a 12.5mm plasterboard face with a bonded PIR insulation layer. The thickness of that insulation layer determines the overall thermal performance.
For a typical 215mm solid brick wall:
- 25mm PIR achieves around 0.70 W/m²K
- 50mm PIR achieves around 0.50 W/m²K
- 70 to 80mm PIR gets close to 0.30 W/m²K
Those numbers give a useful guide, but they are not a substitute for a proper calculation.
Balancing performance with space
There is also a practical side to this. Every increase in board thickness moves the finished wall line further into the room. In tighter spaces, that loss of depth becomes noticeable quite quickly.
The best approach is to confirm the wall build-up and run a U-value calculation before ordering. Once that is done, buying the right plasterboard becomes much simpler. Online Insulation Sales stocks plasterboard systems across the full depth range, including Celotex and Gyproc-compatible options, which means you can match the exact specification rather than choosing the closest available size.
-
Skipping Surface Preparation Before Bonding
This is one of the easiest mistakes to make, especially when the wall looks clean at first glance. In reality, small issues here tend to cause bigger problems later.
Why preparation affects bond strength
Adhesive needs a clean and stable surface to grip properly. Dust, loose plaster, and sealed finishes all reduce adhesion. Over time, that can lead to boards pulling away from the wall.
Proper preparation creates a reliable base, which is what the whole system depends on.
What proper preparation looks like
Start by removing skirting boards, socket faceplates, and anything else fixed to the wall. Clear away loose material, then clean the surface thoroughly so there is no dust left behind.
Next, check the wall for straightness using a long spirit level. If the surface is significantly out of plumb, it should be levelled before installing the boards. Otherwise, those uneven areas will show through the finished wall.
On painted or non-porous surfaces, applying a PVA bonding agent helps the adhesive key properly and improves overall bond strength.
-
Incorrect Dot and Dab Technique
Dot and dab is widely used because it is quick and effective. That only holds true when it is applied consistently and with the right detail.
Getting the adhesive pattern right
The bonding compound should be applied in a regular grid pattern, typically at around 300mm centres. Heavier boards, especially those with thicker insulation, need enough contact points to stay stable while the adhesive sets.
Inconsistent spacing or too few dabs often leads to movement or weak fixing.
The importance of the perimeter gap
A detail that often gets missed is the gap at the floor and ceiling. Leaving around 25mm allows a small amount of airflow behind the board and reduces the risk of moisture being trapped.
Boards fitted tight to the floor are a common sight on retrofit jobs, and they often lead to problems later.
Clean cutting and final checks
Cutting boards cleanly helps everything fit as it should. A sharp score along a straight edge, followed by a controlled snap and a clean cut through the backing paper, usually gives the best result.
Once the board is in place, check it straight away for level and alignment. After the adhesive begins to set, there is very little room for adjustment.
-
Rushing Joint Finishing
This is where the quality of the work really becomes visible. Even a well-installed wall can look poor if the joints are not finished properly.
Why joints crack after decoration
Cracking usually comes down to one issue, moving too quickly between stages. Jointing compound needs time to dry, and skipping that leads to movement and visible defects later.
How to get a clean, durable finish
Scrim tape should be applied to every joint before any compound is added. The compound itself should be built up in thin layers, allowing each coat to dry fully before the next is applied.
Light sanding between coats helps keep the surface smooth. External corners should be reinforced with corner bead to create a clean and durable edge.
For the best overall result, a full skim coat helps to even out any minor variations across the surface.
Confirm the Specification Before Work Starts
Most of these mistakes come back to one thing, starting work without confirming the details first.
When the wall construction is understood, the U-value is calculated, and the correct board thickness is selected in advance, the rest of the process becomes much more predictable. Add proper checks for damp and careful preparation, and the installation tends to run smoothly from start to finish.
If you are at the stage of pricing or ordering materials, it helps to work from a confirmed specification rather than estimates. Suppliers such as Online Insulation Sales stock PIR insulated plasterboard systems across a full range of depths, which makes it easier to match the board to the required thermal performance without over or under specifying.
FAQs
What thickness of insulated plasterboard do I need for an internal wall?
For a solid brick wall, 50mm PIR typically achieves around 0.50 W/m²K. To reach around 0.30 W/m²K, you will usually need 70 to 80mm PIR, but this should always be confirmed with a U-value calculation.
Can insulated plasterboard be fixed using dot and dab?
Yes, this is the standard method for masonry walls. The key is to follow the manufacturer’s guidance and maintain a perimeter gap at floor and ceiling level.
Do I need to treat damp before fitting insulated plasterboard?
Yes. Installing boards over damp traps moisture behind the wall and leads to long-term deterioration.
What is the difference between PIR and EPS insulated plasterboard?
PIR offers better thermal performance per millimetre, with conductivity around 0.022 to 0.023 W/mK. EPS is more cost-effective but needs greater thickness to achieve the same result.